Retro Modern Fireplace Makeover

It's our first makeover reveal, guys! My husband just recently finished remodeling the fireplace and it turned out incredible! The only thing I'm still slightly undecided on is the color of the metal fireplace cover. I had this idea to paint it white instead of black to match the rest of the white, but I also didn't want it all just to blend in together and be a big white blob. My husband painted it white to try it out and really liked the look of it, but I was still gravitating towards black to add some contrast. After a week or so of looking at it though, I think I might want it to stay white after all. Since the fireplace isn't going to be the focal point of the living room, we don't want it to stand out too much anyway, so keeping it simple and clean is the look we are going for. I just hope I don't change my mind about it in the next few weeks!

fullsizeoutput_4aa.jpeg

Here is the BEFORE of the fireplace. Ah, the glory of the 90's bright gold border!

fullsizeoutput_4ac.jpeg

This is the fireplace IN-PROGRESS. I was looking for some white brick to put in instead of tile, but we could not find any! I was kind of bummed at first, but then we found some subway tile that doesn't have straight edges, which gives it a more "stone" look than regular subway tile. I think the tile also makes it look a little more modern than brick would have, and our house is definitely going towards the modern direction.

fullsizeoutput_4ad.jpeg

Here are the columns being finished and put on. I love the simple pattern of them.

fullsizeoutput_4ae.jpeg

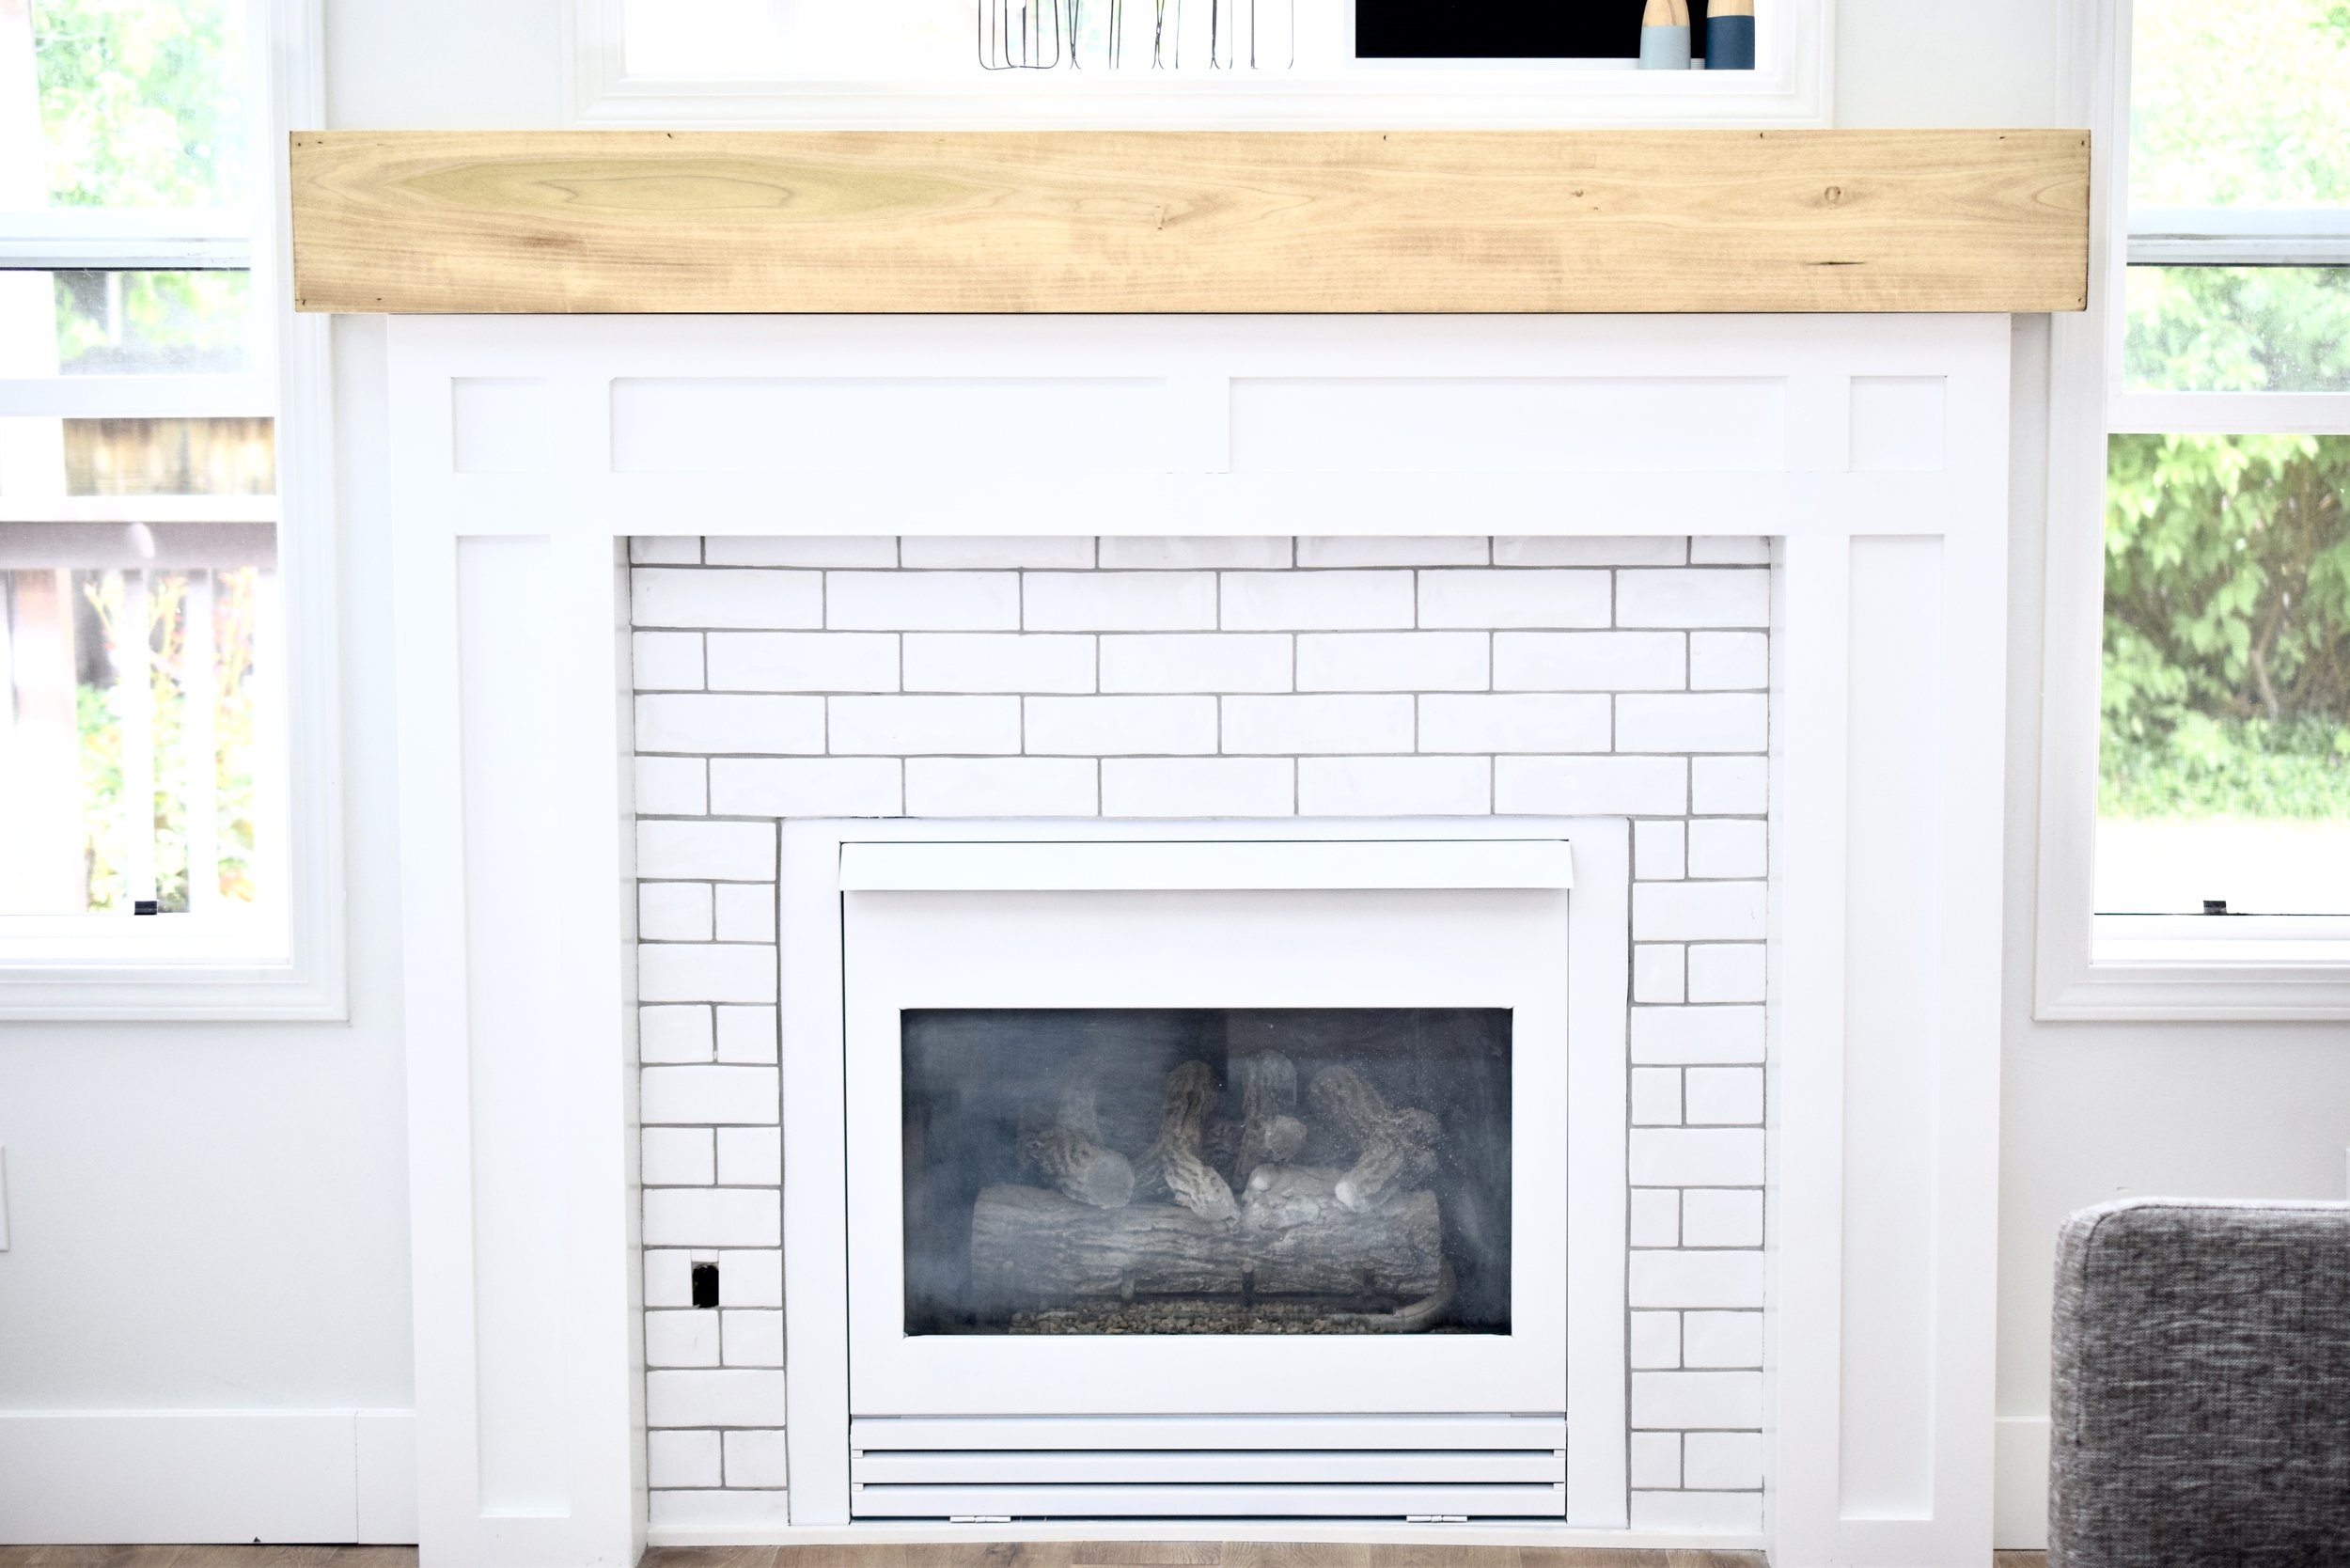
This is the pretty little thing after Alex painted it white and installed the beam. Can you believe that stain is just coffee grounds? It looks amazing, and is the perfect color against the white.

fullsizeoutput_4b5.jpeg

And here she is! The finished product. I love how giant the beam is, especially with the window in the background, and my undying love for white is fulfilled with the rest of the fireplace.

fullsizeoutput_4bd.jpeg

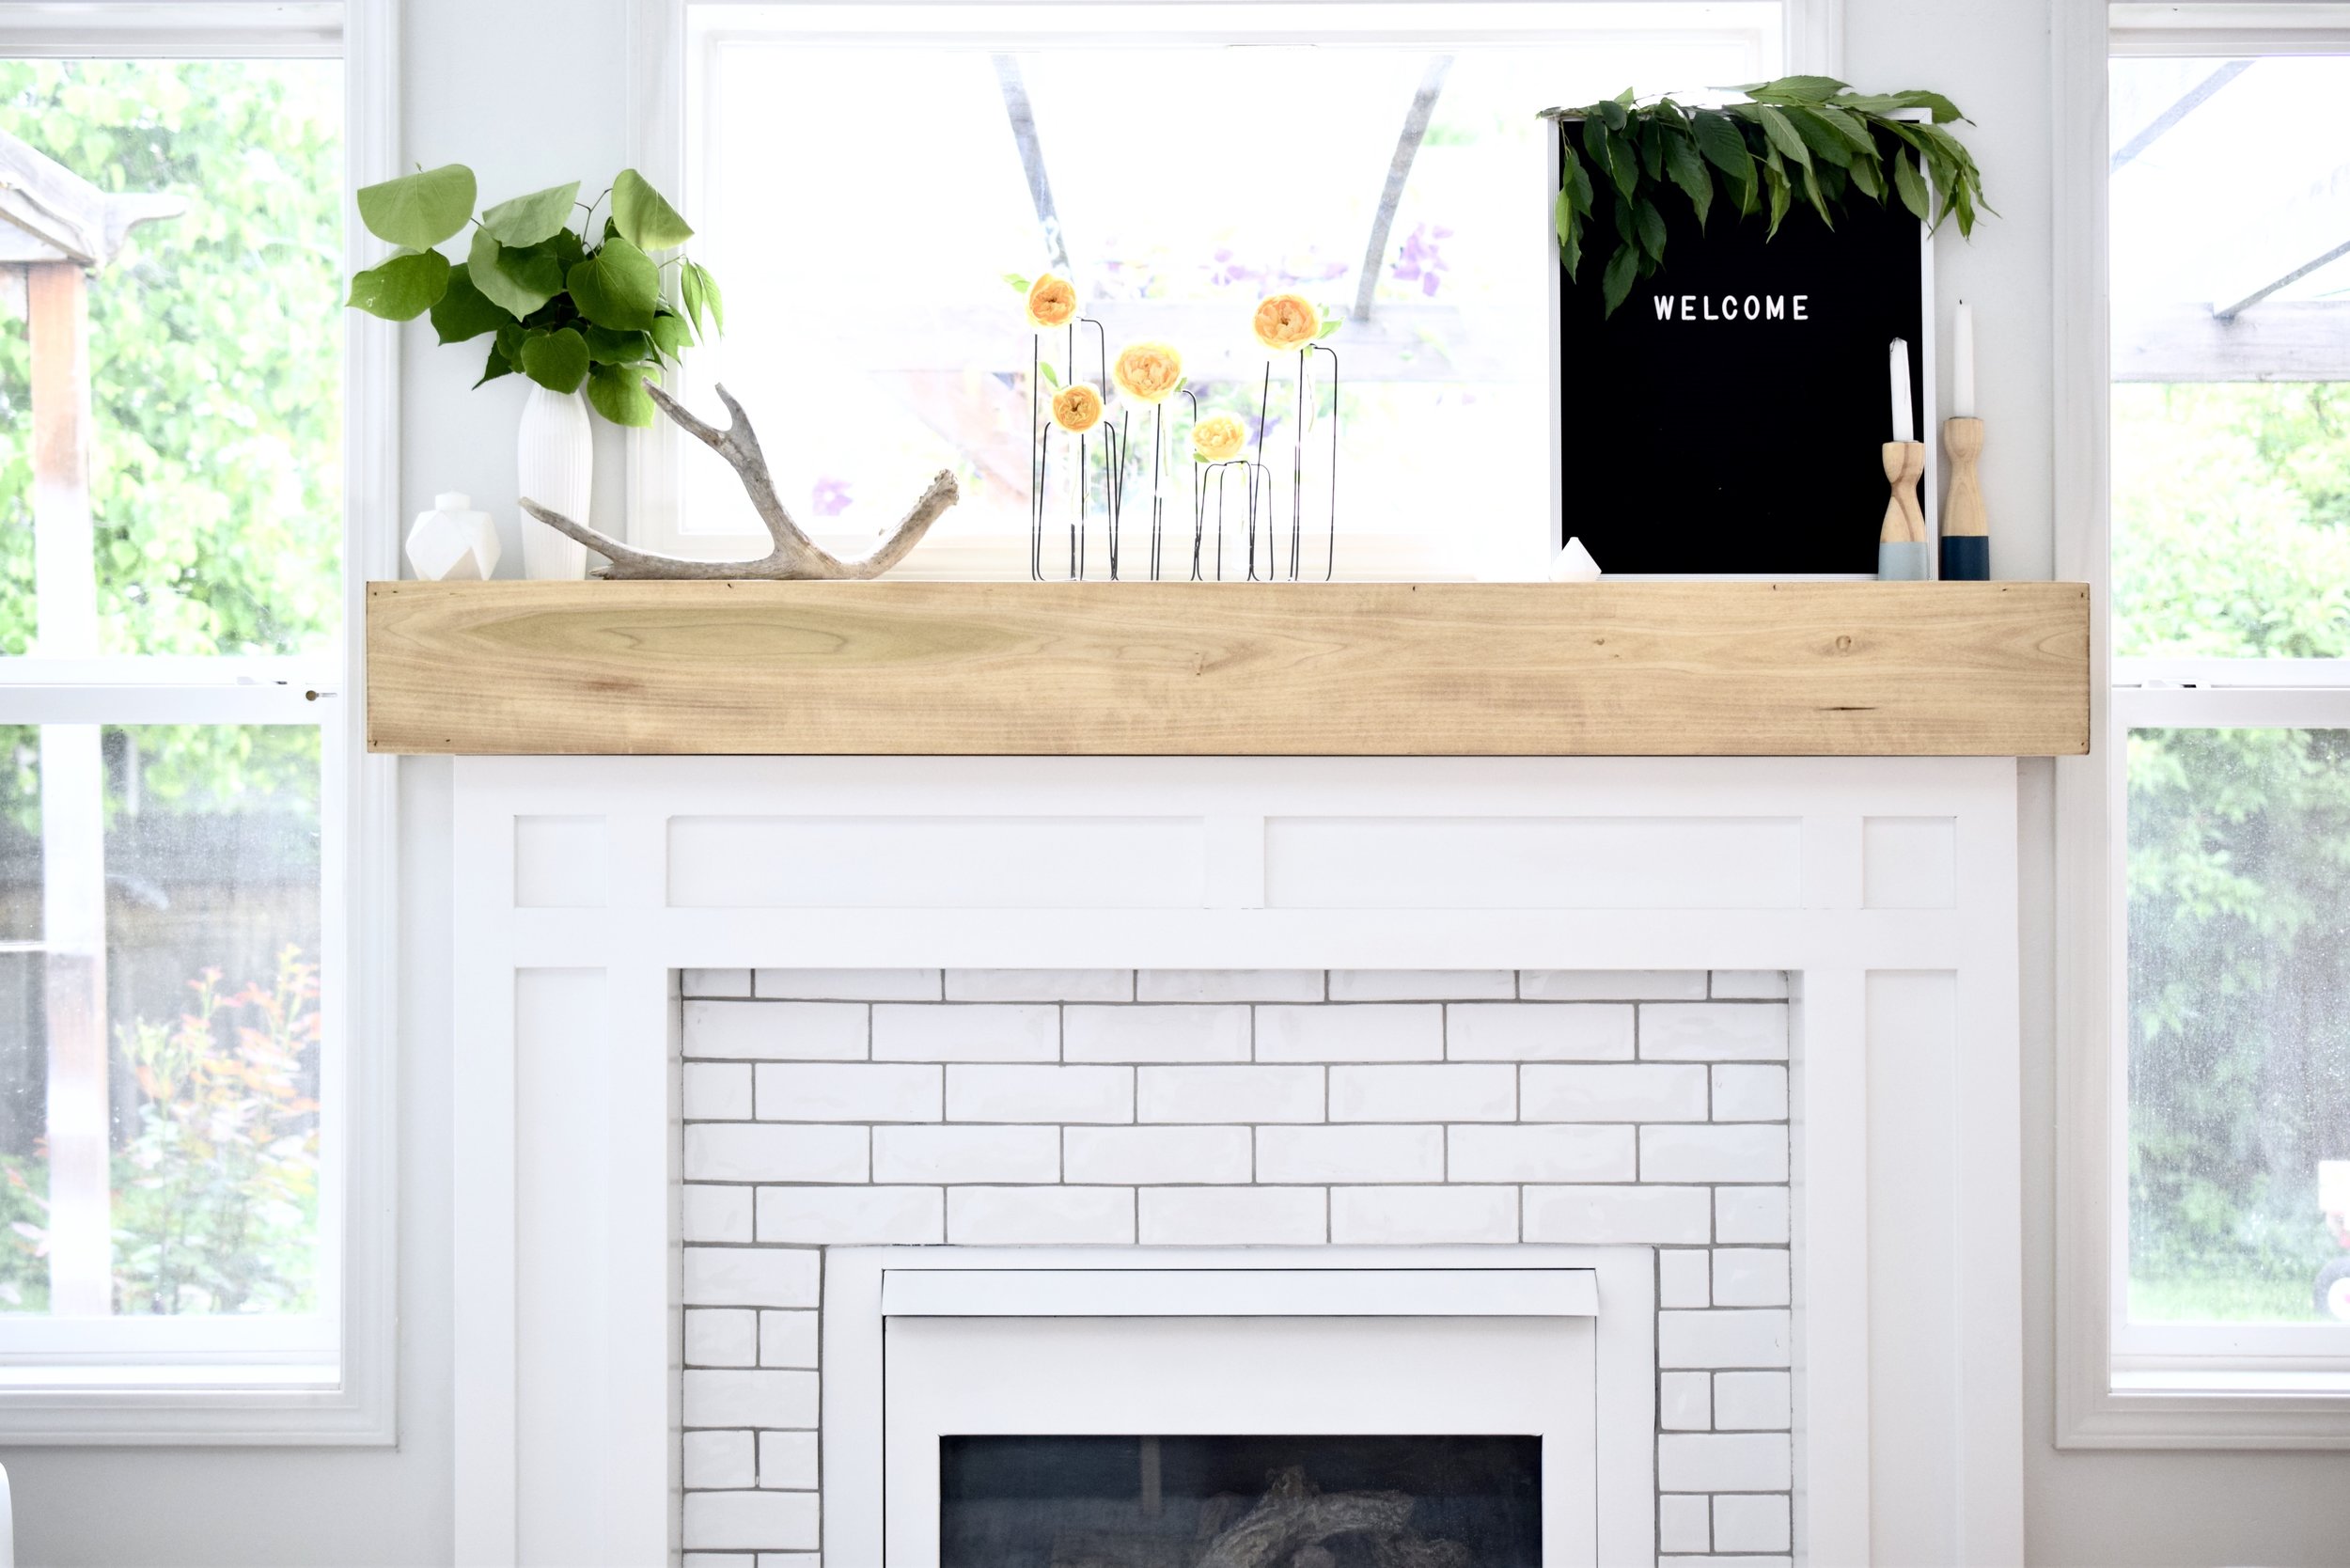
Also, if you want some inspiration to build something like this, my husband did an entire tutorial on this exact fireplace on his blog! You can check it out at www.mr-buildit.com. Let me know what you think about all of the white, and if you think black would add the right amount of contrast instead!

DIY Yarn Tapestry

Yarn Tapestries are the new trendy wall art, and they look beautiful just about anywhere!  I am not even ashamed to admit that I have at least 5 hanging in random areas of my house--and guess what? I made them all! When I first stumbled upon these babies, I was so intimidated to make one because they look so intricate. Once I started one though, I realized that they are not that complicated to make and require minimal materials. But they do still require a bit of time because of all the measuring and cutting. I like to make them while watching a few episodes of Gilmore Girls after putting the kiddos to bed. Here are the steps to making your own darling yarn tapestry.

Supplies:

  • Yarn (I like to use at least 3 different colors for variety)
  • Wooden Dowel (I used a 24 inch one)
  • Scissors
dsc_03291.jpg
dsc_03301.jpg

Step 1: Cut a long string and tie it around your dowel so you can hang it up. This makes it easier to loop the yarn through the dowel without tangling all of the yarn.


dsc_03441.jpg
dsc_03551.jpg

Step 2: Cut your strings. I cut each string about 60 inches long to leave some extra room to trim later. I like to cut about 6-8 strings per bunch, but it depends on the thickness of your yarn. I used pretty thick yarn this time, so I only cut about 6 pieces per bunch. 


dsc_03361.jpg
dsc_03351.jpg

Step 3: Tie your string. After cutting your 6 strings, fold the bunch of strings in half and then loop it around your dowel to create a knot. Repeat cutting the strings, bunching it up, and tying it to the dowel about 2 or 3 more times, depending on how much of that color you want. I started with three bunches of the turquoise color, and then added a fourth later.


dsc_03561.jpg
dsc_03431.jpg
dsc_03591.jpg
dsc_03631.jpg
dsc_03641.jpg
dsc_03651.jpg

Step 4: Repeat Step 3 with the rest of the colors. This is where it gets fun! You can add whatever colors of yarn you want and make whatever pattern you want! I tend to stick with neutrals and add a pop of color. Remember, keep your strings long enough so you have some room to trim the string.

dsc_0378-21.jpg
dsc_0371-21.jpg
dsc_03741.jpg

Step 5: Trim your tapestry. You can get creative with this part too. I trimmed the yarn in steps and by color, but you can trim it anyway you want! Sometimes I like to create a V with the string, and sometimes I like the more abrupt edges. 

dsc_03861.jpg
dsc_03831.jpg
dsc_03991.jpg